A guide to Body Maps, our tattoo body reference kit.
Hey everyone, My name is Jack Pearce AKA GOKS and @Goksisdead on IG, If you are reading this after purchasing my Body Maps set from Tattoo Space, Thank you for the support! If you have not  purchased it, do yourself a huge favor and go grab it because it's going to make your life as a tattooer, much less complicated.  Okay so,
First, what I do whenever I start a drawing for a tattoo is consider the location on the body and how best to place my subject matter, so that it uses that area most effectively. A well designed and executed tattoo will look bad if it just doesn’t sit right on the body. So, I believe having a good foundation for the design is key to helping it look and fit the body best.


A good tattoo will flow in harmony with the body. It will flow with the bends and bumps and key parts of the design placed in the right area will be clear and understandable and most importantly eye catching. These key areas will be the flattest and most viewable from looking at the area straight on.


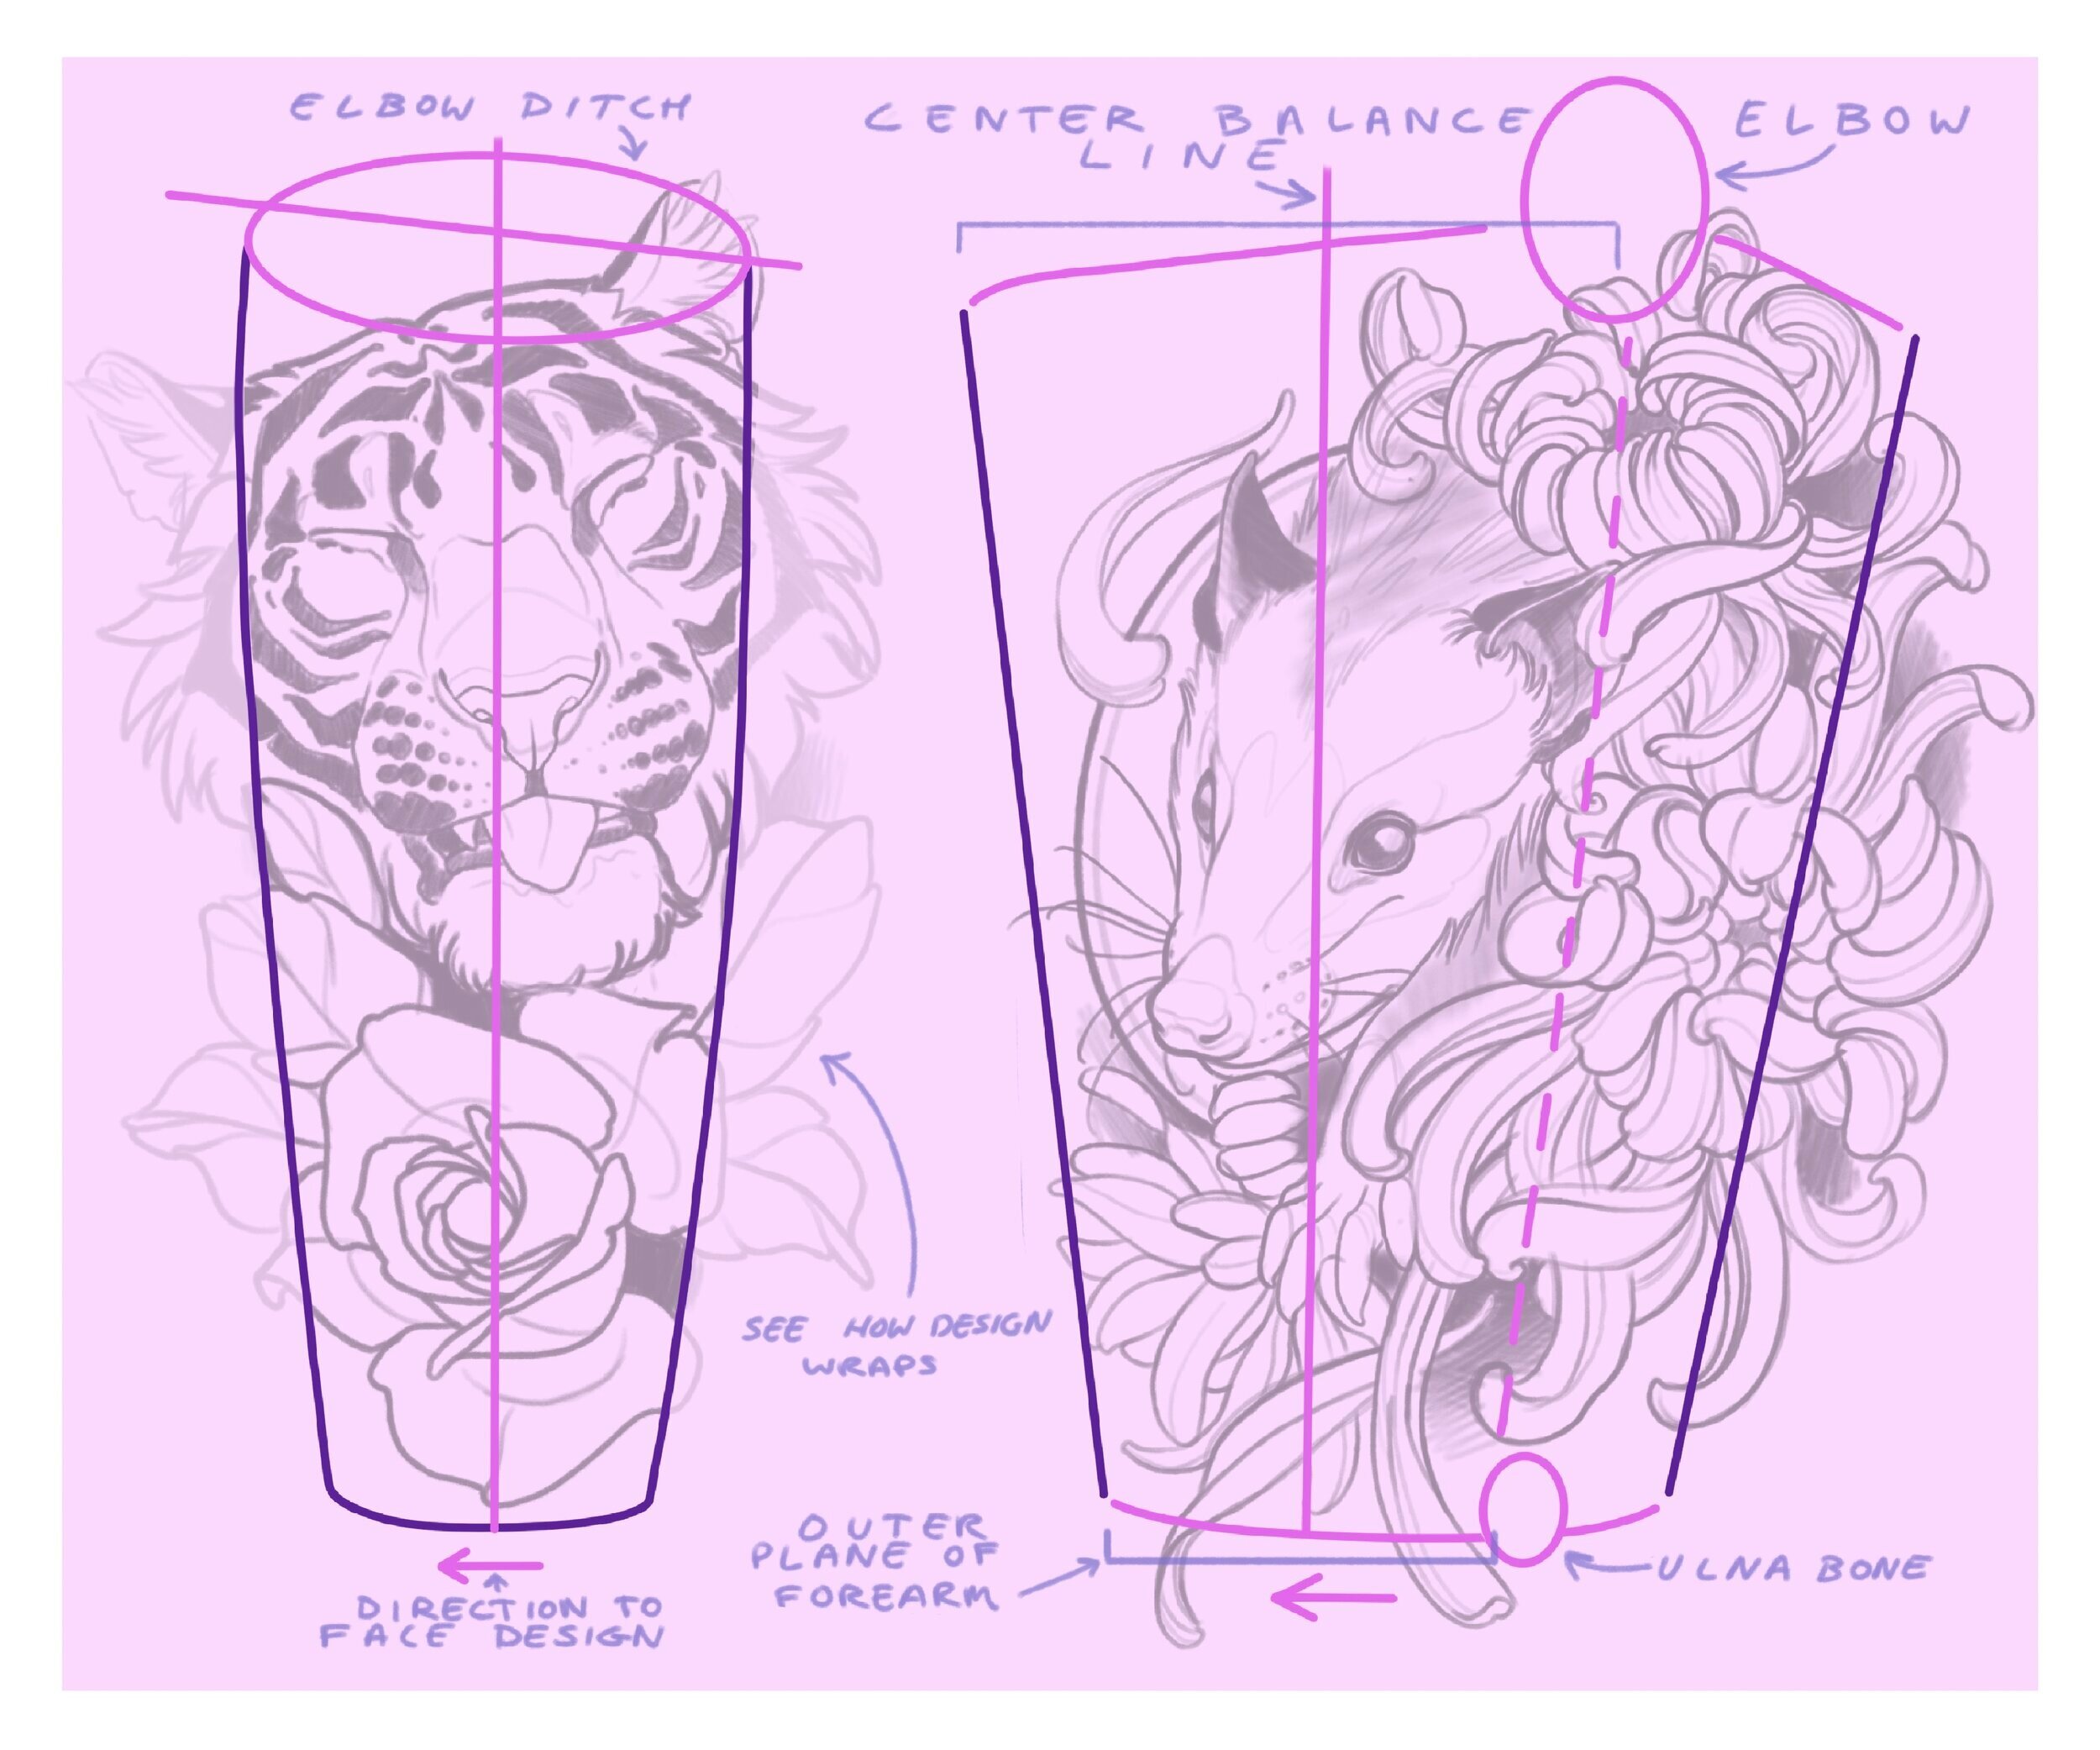
Understanding where the key visual feature of the design is located and placing that on the body for maximised effect, so that it is not hindered by a bend or bump. For example, with an outer forearm tattoo you will want the key elements of the design to sit in the flattest and most visual region of the arm. This can be found between the ulna bone (the bone you can feel running from elbow to wrist) and where the arm begins to wrap around and becomes the inner forearm area. To indicate this area, I have simply drawn a balance line down the center of that area to indicate that you will want to have the key visual part of the design sit along this line in some way. This way the most important part of the design will stand out and not be interrupted by the curve of the arm, the rest of the design is welcome to wrap around or cross over into the elbow or inner forearm.


With most parts of the body you have to consider wrap, for example an inner forearm though it can allow for a wide design to work, you must consider the drop off of visual space at either side of the area. A wide design will appear narrower once applied to the skin as it curves around the arm. Generally, the inner forearm has a flat surface from the ditch to the wrist roughly around 3 to 4 inches wide. As the surface area curves around and becomes the outer forearm, any design that is wide will start to distort, the more it breeches into this area on either side (as viewed from straight on). To work with this it’s best to have key visual elements sit on a center vertical line inside this 3-4 inch flat plane and have the lesser important details in the areas that will wrap around out of view.


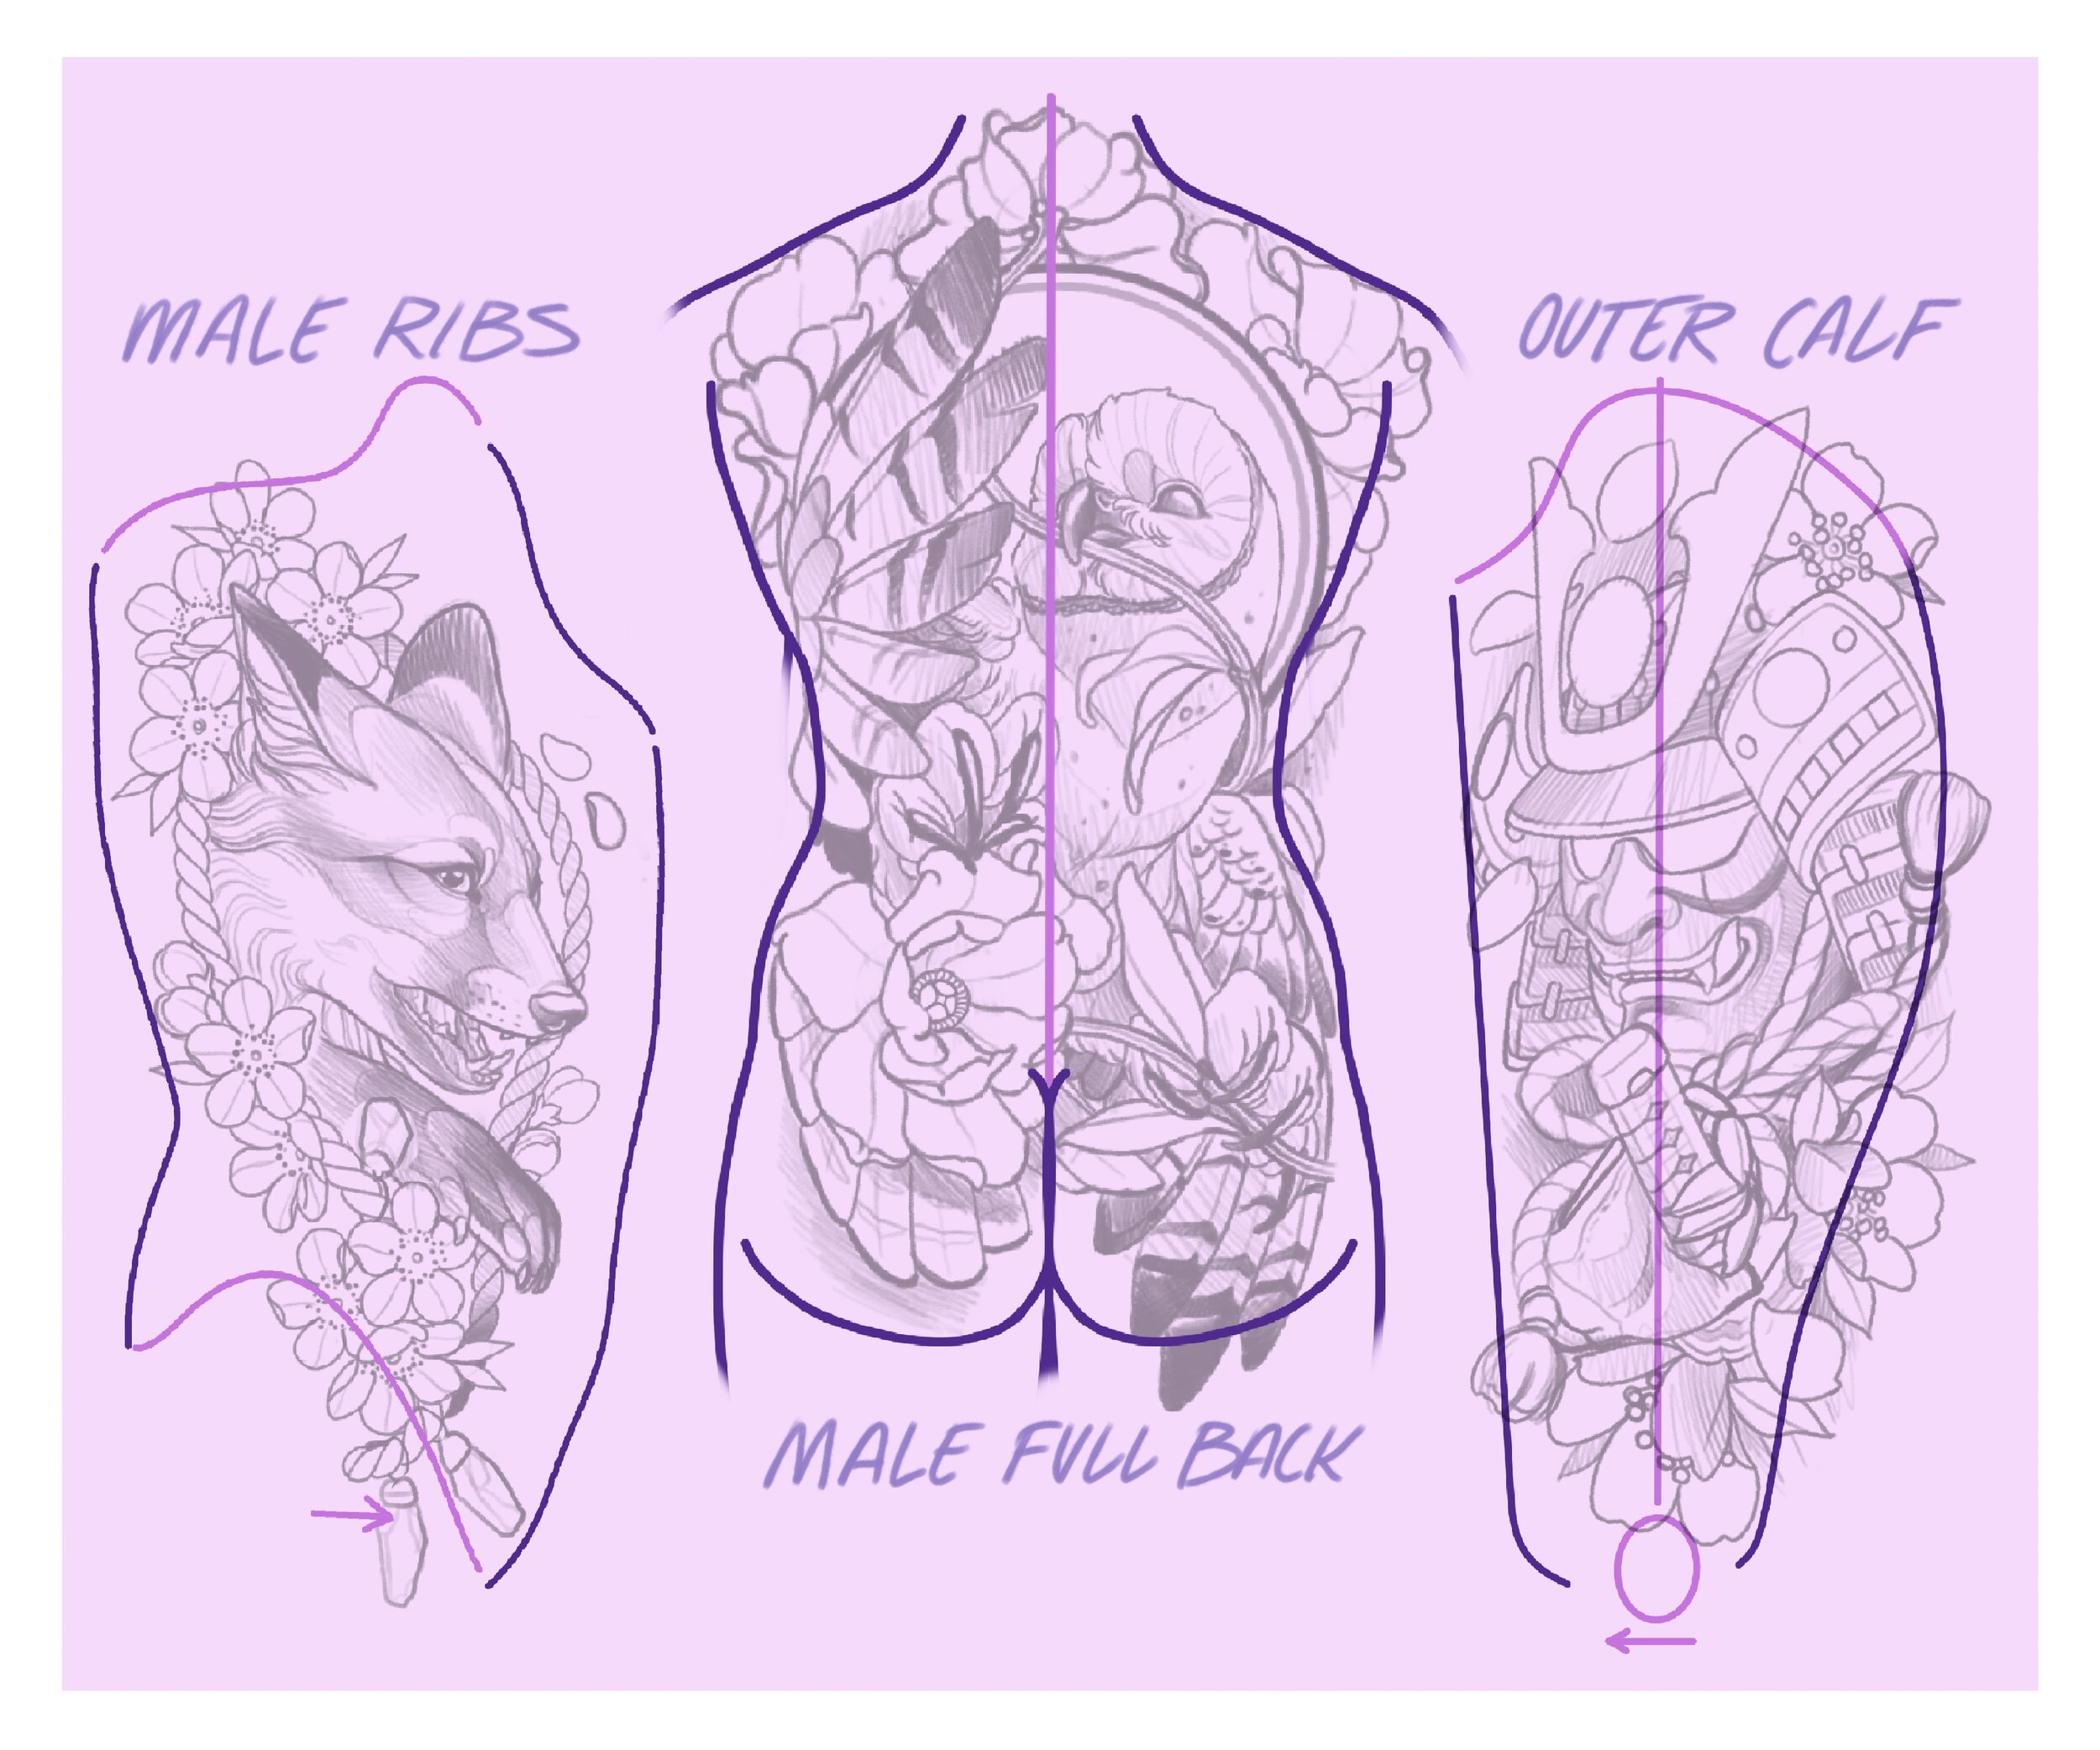
I have colour coded the maps, a Darker shade line representing the general shape of the location in relation to the body. And a lighter shade line to represent guidelines, elbows, bends and wrap. Areas marked out with dotted lines represent the area that sits most flattest and is the front on most viewed visual space.


 With bodies it’s never one size fits all, these maps are generic ideas of the location and may not fit your client perfectly. This can be compensated by adjusting the map to better fit your client if you know their rough dimensions or by taking a photo of said clients body part or full body, load that image into Procreate and adjust  your map to scale. Or just use the maps  loosely with the general idea of the shape of the location. This way you can see ahead of time how the design fits the area and if any changes need to be done to make the design fit better.
For example, avoiding working in more difficult areas like elbows and armpit creases and what parts of the design will be affected by wrap. This will be easier to spot when applying your design to the map and noting what parts of the design fill onto undesirable working areas.


The arrow indicates which direction to face the design. In tattooing a general rule is that all designs should face the center of the body (heart). For example, front thigh tattoos should face inwards towards each other. And top outer arms will face forward in the same direction the body faces. There is one exception to this rule that tattoo artists might disagree on and that’s the inner forearm. If they face inwards towards the heart when the arm is relaxed down by your side then the tattoo would face backwards and if the design is a side profile face then the part of the design displayed most would be the back of the head and this can look strange. If they face away from the heart when the arm is relaxed  you see the face of the design.


Not just for the construction of designs these maps can also be used as visual representation for flash to indicate how the tattoos could be worn for clients who may need slightly more obvious visual queues.


If you're an advanced artist and someone who has been working with large scale tattoos, you may already be utilising these techniques and would most likely draw similar body maps in the moment before drawing your designs. The benefit of this brush set is the quick ease of use. Within only a few seconds you can instantly have a perfectly usable map and save time figuring out these dimensions yourself every time.


If you're new to large scale work or tattooing in general, then these maps will help you advance your designing skills and bring greater dimension to your designs and allow your tattoos to fit more harmoniously on the client.


When using these maps I recommend turning the opacity down to around 20% so they sit in the background. That way you can still see and use them, but they don’t interrupt and distract the viewer while drawing or observing how the design fits the area. Remember, to start your sketch on a new layer so you can move the design around freely on top of the map to find the best fit.


I hope you all enjoy my Body Maps product for Procreate and I appreciate all of the support ! I hope this little guide helps and stay tuned for more amazing content from myself and Tattoo Space!!


